Microsoft SQL Server 2025 is the latest major release of the enterprise-grade relational database management system. The Developer edition is completely free and includes every feature found in the Enterprise edition, making it the ideal choice for development, testing, and learning environments. In this comprehensive guide, we will walk through the entire process of downloading, installing, and configuring SQL Server 2025 Developer edition on a Windows machine. By the end of this tutorial, you will have a fully functional SQL Server instance with mixed-mode authentication, remote connectivity, and a properly configured sa account.
1. Download SQL Server 2025 Developer Edition
The first step is to obtain the SQL Server 2025 installer from the official Microsoft website. Microsoft provides a lightweight bootstrapper executable that handles the download and installation of all required components.
-
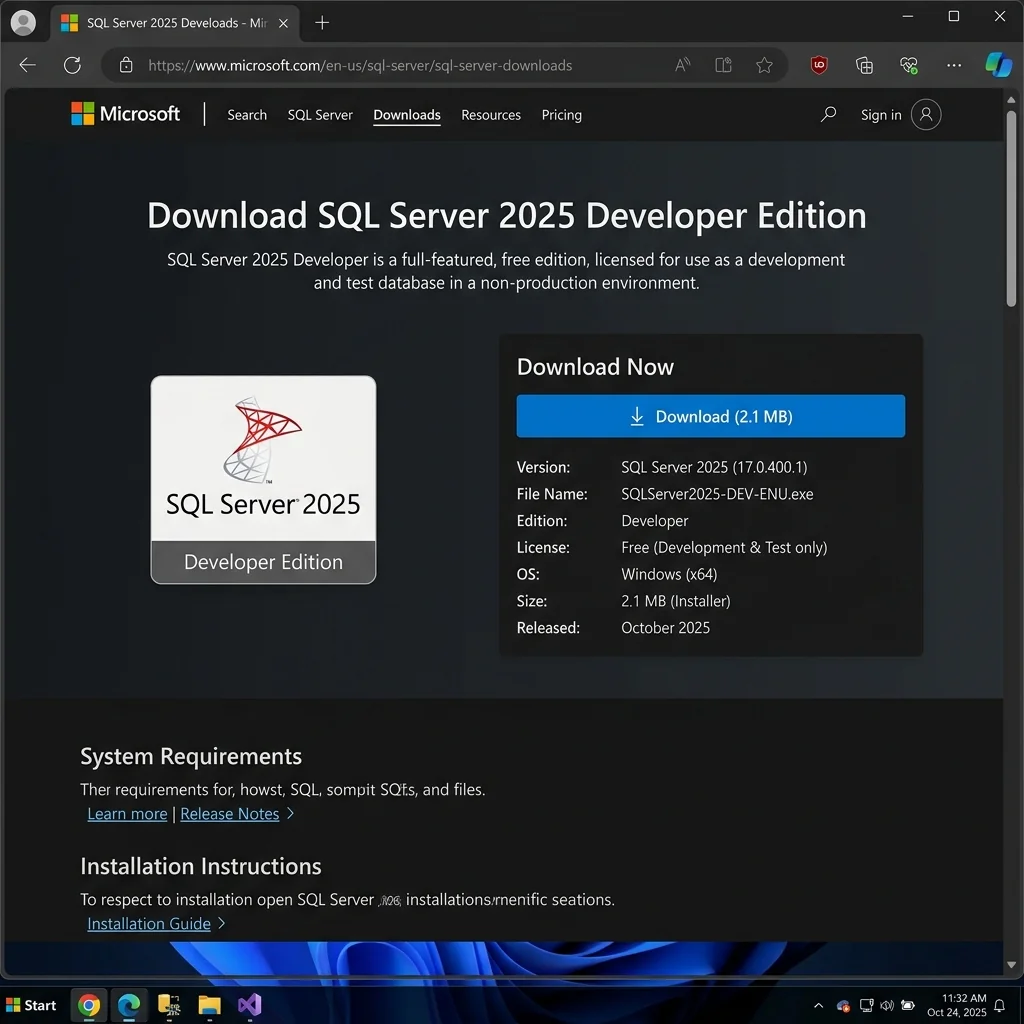
Open your web browser and navigate to the official SQL Server downloads page:
https://www.microsoft.com/en-us/sql-server/sql-server-downloads
-
Scroll down to the Developer section. You will see a brief description stating that the Developer edition is a full-featured, free edition licensed for use as a development and test database in a non-production environment.
-
Click the Download now button. This will download a small bootstrapper file named
SQLServer2025-DEV-ENU.exe(approximately 2 MB) to your default Downloads folder. -
Save the file to a convenient location such as
C:\Downloads\or your Desktop for easy access.
Tip: If you need to install SQL Server on an air-gapped or offline machine, use the Download Media option in the installer to download a full ISO or CAB file that can be transferred to the target machine.
2. Run the SQL Server Installer
Once you have downloaded the bootstrapper, you are ready to begin the installation process. Make sure you are logged in with an administrator account and that your machine meets the minimum system requirements (Windows 10 version 1607 or later, at least 6 GB of available disk space, and a minimum of 4 GB RAM).
-
Launch the installer: Right-click
SQLServer2025-DEV-ENU.exeand select Run as administrator. The SQL Server Installation Center will appear. -
Choose installation type: You will see three options:
- Basic – Installs the Database Engine with default settings. Best for quick setups.
- Custom – Lets you choose specific features and configure advanced options.
- Download Media – Downloads the installation files for offline use.
Select Custom to have full control over the installation.
-
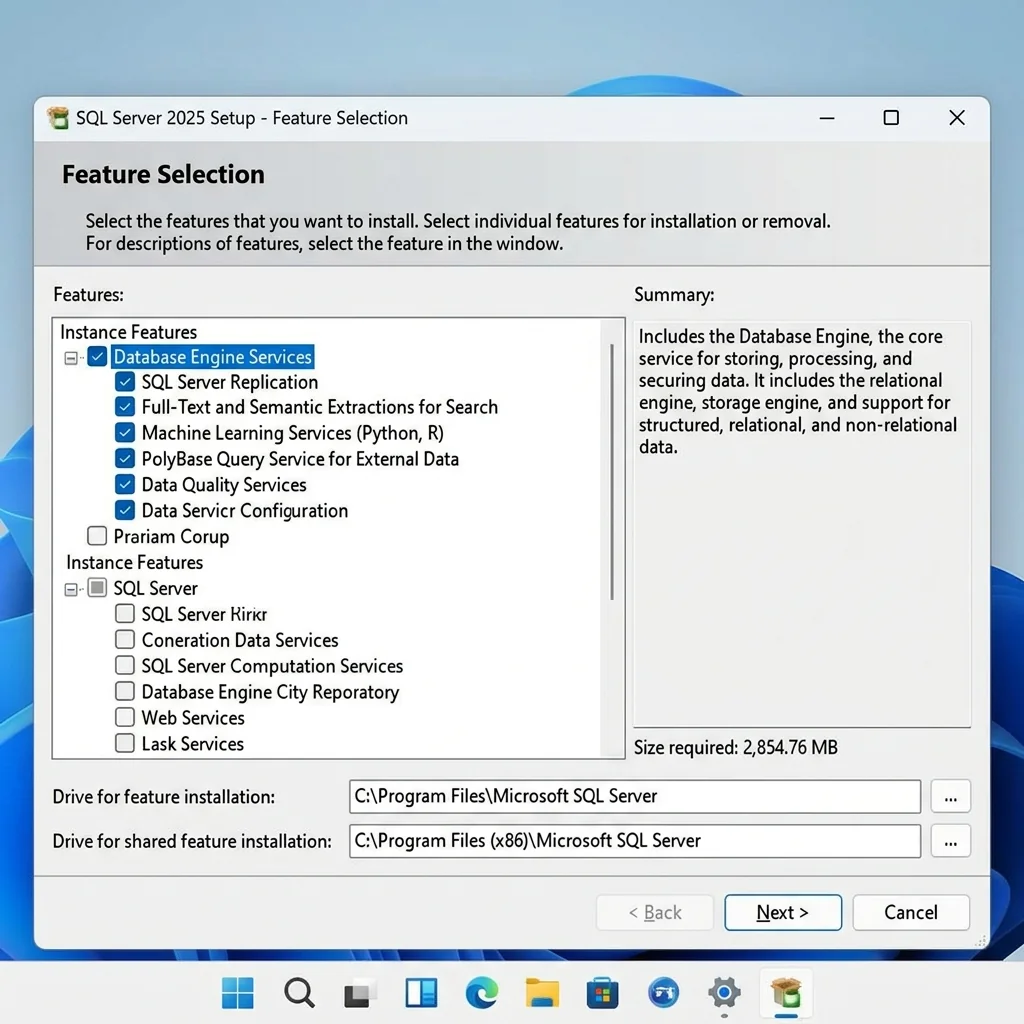
Feature Selection: In the Feature Selection screen, check the features you need. At minimum, select:
- ✅ Database Engine Services – The core SQL Server engine.
- ✅ SQL Server Replication – For data replication scenarios.
- ✅ Full-Text and Semantic Extractions for Search – For full-text indexing.
- ✅ Machine Learning Services (Python, R) – Optional, for data science workloads.
Leave the installation directories at their default values unless you have specific disk layout requirements.
-
Instance Configuration: Keep the default instance name MSSQLSERVER. If you already have another SQL Server instance installed, you may choose a named instance instead.
-
Server Configuration: On the Service Accounts tab, the default accounts (
NT Service\MSSQLSERVERfor the Database Engine andNT Service\SQLSERVERAGENTfor SQL Server Agent) are appropriate for most scenarios. Set the SQL Server Agent startup type to Automatic if you plan to use scheduled jobs. -
Click Next to proceed to the Database Engine Configuration step (covered in the next section).
3. Configure Authentication Mode: Windows and SQL Server
The Database Engine Configuration page is one of the most critical steps in the installation process. This is where you set the authentication mode and specify who has administrative access to the SQL Server instance.
-
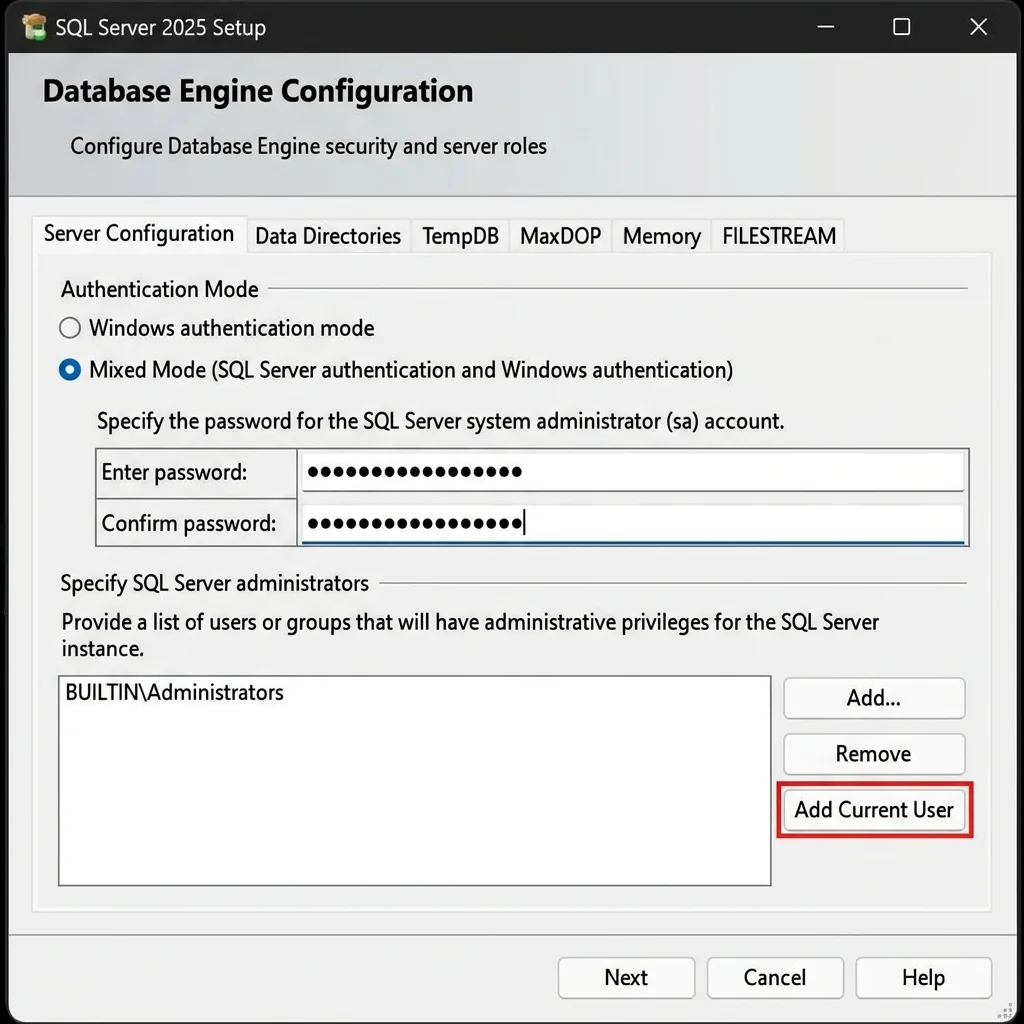
On the Server Configuration tab, under Authentication Mode, select:
Mixed Mode (SQL Server authentication and Windows authentication)
This allows both Windows-integrated logins and SQL Server logins (such as
sa) to connect to the instance. Mixed mode is required if you plan to connect from applications that do not support Windows authentication or from non-Windows clients. -
Set the
sapassword: Enter a strong password for the system administrator (sa) account. This password must meet the SQL Server password complexity requirements:- At least 8 characters long
- Contains uppercase and lowercase letters, numbers, and special characters
- Does not contain the word “password” or the user’s account name
-
Under Specify SQL Server administrators, click Add Current User to add your Windows account as an SQL Server administrator. You can also click Add… to add additional users or groups.
-
Click Next and then Install to begin the installation. The process typically takes 10–20 minutes depending on your hardware.
Important: Write down the
sapassword and store it securely. If you lose it, you will need to restart SQL Server in single-user mode to reset it.
4. Enable the sa Account and Change Its Password
If Mixed Mode was not selected during installation, or if the sa account was disabled after installation, you can enable it and set a new password using PowerShell or sqlcmd.
Using sqlcmd (PowerShell / Command Prompt)
Open a PowerShell or Command Prompt window as Administrator and run:
# Enable the sa account
sqlcmd -S localhost -Q "ALTER LOGIN sa ENABLE;"

# Set a new password for sa
sqlcmd -S localhost -Q "ALTER LOGIN sa WITH PASSWORD = 'YourNewStrongPassword!';"
Using SQL Server Management Studio (SSMS)
- Connect to your SQL Server instance using Windows Authentication.
- Expand Security → Logins.
- Right-click sa and select Properties.
- On the General page, enter a new password.
- On the Status page, set Login to Enabled.
- Click OK.
After enabling the sa account, test the connection by logging in with sa credentials:
sqlcmd -S localhost -U sa -P 'YourNewStrongPassword!' -Q "SELECT @@VERSION;"
5. Enable Remote Connections
By default, SQL Server only accepts local connections. To allow connections from other computers on your network, you need to enable the TCP/IP protocol and configure the Windows Firewall.
Step 1: Enable TCP/IP in SQL Server Configuration Manager
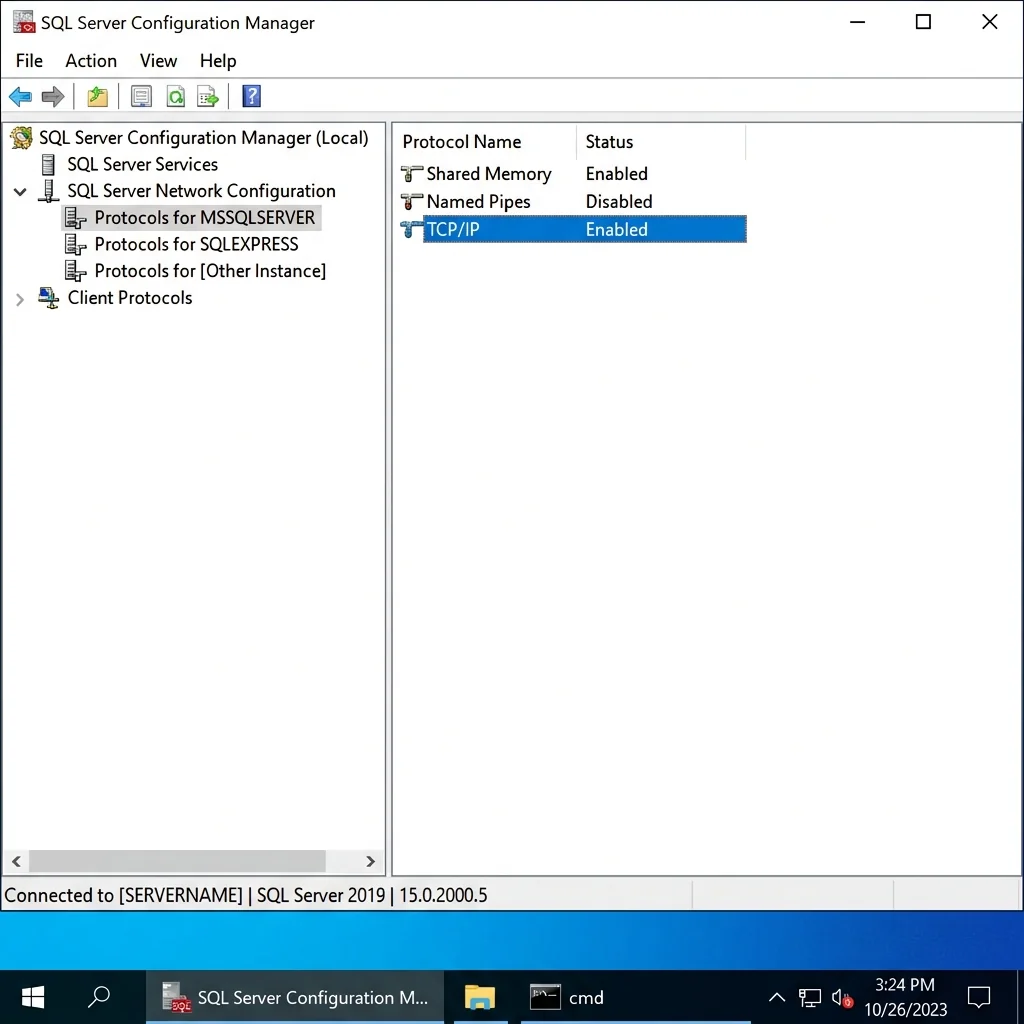
- Open SQL Server Configuration Manager (search for it in the Start menu, or run
SQLServerManager16.msc). - In the left panel, expand SQL Server Network Configuration.
- Click Protocols for MSSQLSERVER.
- In the right panel, right-click TCP/IP and select Enable.
- Double-click TCP/IP to open its properties. On the IP Addresses tab, scroll to IPAll and set:
- TCP Port:
1433(the default SQL Server port) - TCP Dynamic Ports: Leave blank
- TCP Port:
Step 2: Configure Windows Firewall
Open PowerShell as Administrator and create a firewall rule to allow inbound connections on port 1433:
New-NetFirewallRule -DisplayName "SQL Server (TCP 1433)" `
    -Direction Inbound `
    -Protocol TCP `
    -LocalPort 1433 `
    -Action Allow `
    -Profile Domain,Private
Step 3: Restart the SQL Server Service
After making network configuration changes, you must restart the SQL Server service for the changes to take effect:
Restart-Service -Name 'MSSQLSERVER' -Force
Step 4: Test Remote Connectivity
From a remote machine, test the connection using sqlcmd or SSMS:
# From a remote computer (replace SERVER_IP with your SQL Server's IP address)
sqlcmd -S SERVER_IP,1433 -U sa -P 'YourNewStrongPassword!' -Q "SELECT @@SERVERNAME;"
6. Required SQL Server Services
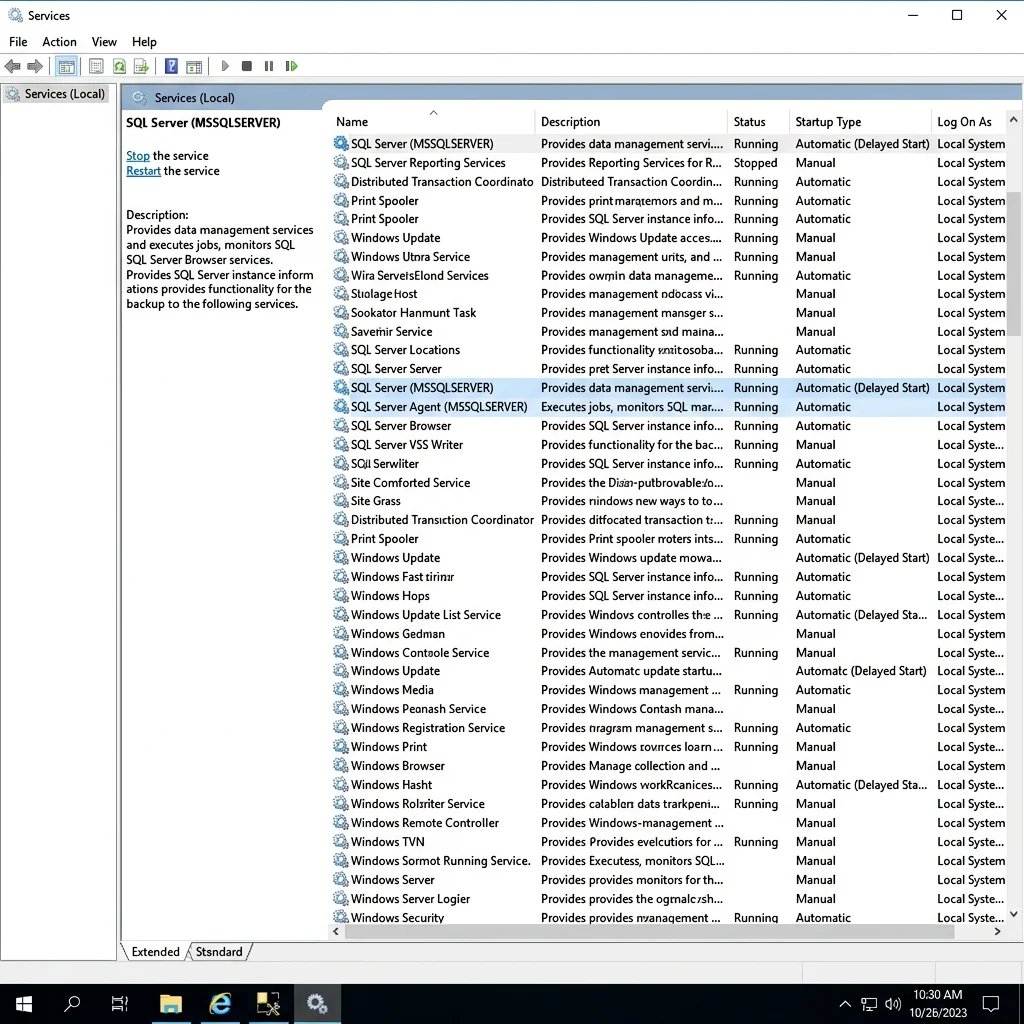
SQL Server relies on several Windows services to operate. Understanding which services are required and what each one does will help you troubleshoot issues and optimize your server’s resource usage.
| Service Name | Display Name | Purpose | Startup Type |
|---|---|---|---|
MSSQLSERVER |
SQL Server (MSSQLSERVER) | The core database engine that processes queries, manages databases, and handles transactions. | Automatic |
SQLSERVERAGENT |
SQL Server Agent (MSSQLSERVER) | Executes scheduled jobs, alerts, and operators. Required for automated maintenance plans and job scheduling. | Automatic |
SQLBrowser |
SQL Server Browser | Listens for incoming requests and provides connection information for named instances. Essential when hosting multiple instances. | Automatic |
MSSQLFDLauncher |
SQL Full-text Filter Daemon Launcher | Hosts the filter daemon process used by full-text search indexing. Only needed if you use full-text search. | Manual |
SQLWriter |
SQL Server VSS Writer | Provides the interface between SQL Server and the Volume Shadow Copy Service (VSS) for backup and restore operations. | Automatic |
SQLTELEMETRY |
SQL Server CEIP service | Collects usage data and sends it to Microsoft (can be disabled). | Automatic |
You can view all SQL Server-related services at any time with:
Get-Service -Name 'MSSQL*','SQLSERVERAGENT','SQLBrowser','SQLWriter','MSSQLFDLauncher' |
    Format-Table Name, DisplayName, Status, StartType -AutoSize
7. How to Stop SQL Server Services
There are situations where you may need to stop SQL Server services — for maintenance, patching, or to free up system resources. You can do this either through the graphical Services console or from the PowerShell command line.
Method 1: Using Services.msc (GUI)
- Press Win + R to open the Run dialog.
- Type
services.mscand press Enter. - In the Services window, scroll down to find services that start with SQL Server.
- Right-click SQL Server (MSSQLSERVER) and select Stop.
- A confirmation dialog may appear warning that dependent services (such as SQL Server Agent) will also be stopped. Click Yes to proceed.
- Repeat for any other SQL Server services you wish to stop, such as SQL Server Browser or SQL Server Agent.
Note: When you stop the main SQL Server (MSSQLSERVER) service, the SQL Server Agent service will automatically stop as well, since it depends on the Database Engine.
Method 2: Using PowerShell Command Lines
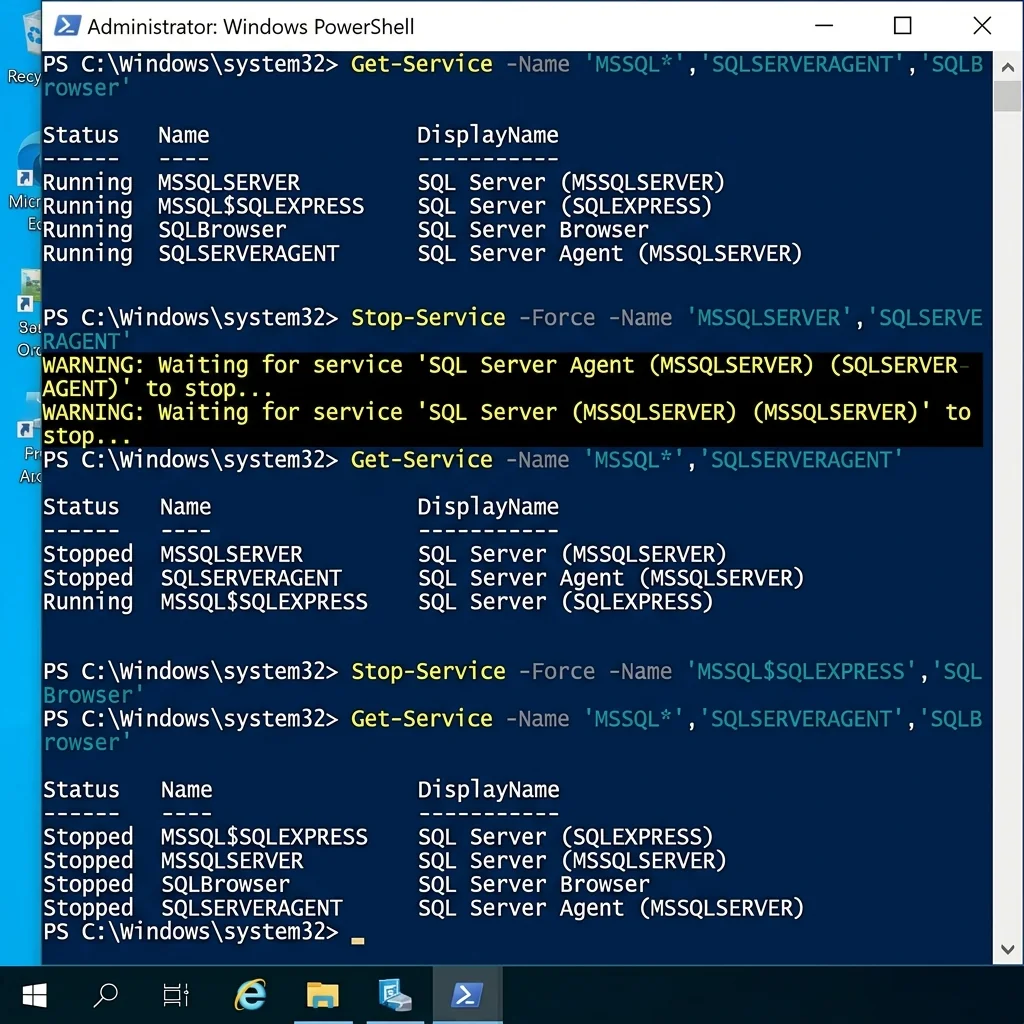
PowerShell provides a faster and more scriptable way to manage SQL Server services. Open a PowerShell window as Administrator and use the following commands:
Check the current status of all SQL Server services:
Get-Service -Name 'MSSQL*','SQLSERVERAGENT','SQLBrowser','SQLWriter','MSSQLFDLauncher' |
    Format-Table Name, DisplayName, Status -AutoSize
Stop all SQL Server services at once:
Get-Service -Name 'MSSQL*','SQLSERVERAGENT','SQLBrowser','SQLWriter','MSSQLFDLauncher' |
    Where-Object { $_.Status -eq 'Running' } |
    Stop-Service -Force
Stop only the Database Engine (which also stops dependent services):
Stop-Service -Name 'MSSQLSERVER' -Force
Start the services back up:
Start-Service -Name 'MSSQLSERVER'
Start-Service -Name 'SQLSERVERAGENT'
Start-Service -Name 'SQLBrowser'
Tip: You can create a simple PowerShell script to automate stopping and starting SQL Server services during maintenance windows. Save the commands above to a
.ps1file and schedule it using Task Scheduler.
Summary
In this guide, we covered the complete process of setting up SQL Server 2025 Developer edition:
- Downloaded the SQL Server 2025 Developer bootstrapper from Microsoft’s official website.
- Installed SQL Server using the Custom installation type with Database Engine Services and related features.
- Configured Mixed Mode authentication to allow both Windows and SQL Server logins.
- Enabled the
saaccount and set a strong password usingsqlcmd. - Enabled remote connections by configuring TCP/IP, opening the firewall, and restarting the service.
- Identified the required Windows services that SQL Server depends on.
- Learned how to stop and start SQL Server services using both the Services console and PowerShell.
Your SQL Server instance is now ready for development and testing. For production environments, consider additional hardening steps such as disabling the sa account in favor of named logins, implementing SSL/TLS encryption, and configuring SQL Server Audit for compliance.
💬 Comments