Windows 11 includes useful security controls, but a hardening checklist can cause lockouts or break older devices if it is applied as a single blind script. The right settings depend on whether the PC is standalone, managed by an organization, used for Remote Desktop, or still needs legacy network equipment. Run administrative commands from an elevated PowerShell window and keep a tested recovery administrator account available.
Quick answer
Start with a current backup, Windows Update, standard user accounts for daily work, Microsoft Defender Firewall enabled, and Windows Security protections enabled. Disable unused Guest access and SMBv1, turn off LLMNR where your network supports it, require NLA if RDP is enabled, and audit Defender ASR rules before enforcing them. Hiding an account tile is cosmetic, and setting PowerShell’s language mode from a script is not a security boundary.
Before changing a setting
These examples target Windows 11 and built-in Windows PowerShell 5.1 or PowerShell 7 running on Windows. Several commands need an elevated session. Check whether a device is managed before changing it: Group Policy, Intune, or another endpoint manager may reapply its own configuration and override local settings.
Record the current state, make sure BitLocker recovery information is available, and test changes on one representative machine first. For a remotely administered computer, do not change account membership or Remote Desktop firewall settings until you have an alternate access path. A change that is reasonable at a desk can strand an unattended PC.
Hide the Local Administrator Account From the Sign-in Screen
The SpecialAccounts\UserList registry value can hide an account tile, but it does not disable the account, strengthen its password, or prevent sign-in by other means. The built-in Administrator is identified by a well-known SID ending in -500; hiding its name is obscurity, not protection. On a computer where it is the only usable administrator, hiding it can make support and elevation confusing. Prefer disabling unused accounts and protecting every enabled administrator with a strong unique password. Use this only after verifying another administrator can sign in.
The example finds the built-in Administrator by SID rather than assuming its localized or renamed account name. Run it in an elevated PowerShell session:
#Requires -RunAsAdministrator
$admin = Get-LocalUser | Where-Object { $_.SID.Value -match '-500$' }
if (-not $admin) { throw 'The built-in Administrator account was not found.' }

$userList = 'HKLM:\SOFTWARE\Microsoft\Windows NT\CurrentVersion\Winlogon\SpecialAccounts\UserList'
New-Item -Path $userList -Force | Out-Null
New-ItemProperty -Path $userList -Name $admin.Name -PropertyType DWord -Value 0 -Force | Out-Null
Write-Host "Hidden sign-in tile for '$($admin.Name)'. The account remains enabled."
To show it again, set the value to 1 or remove the value. Removing the value restores the default display behavior:
#Requires -RunAsAdministrator
$admin = Get-LocalUser | Where-Object { $_.SID.Value -match '-500$' }
$userList = 'HKLM:\SOFTWARE\Microsoft\Windows NT\CurrentVersion\Winlogon\SpecialAccounts\UserList'
Remove-ItemProperty -Path $userList -Name $admin.Name -ErrorAction SilentlyContinue
The sign-in screen is not the only place Windows can expose account names. Treat this as a presentation preference, not a meaningful hardening control.
Disable Unused Built-in Accounts Carefully
The Guest account (SID ending in -501) should not be enabled for ordinary home or workstation use. Windows commonly disables it by default. This command disables it if present and currently enabled:
#Requires -RunAsAdministrator
$guest = Get-LocalUser | Where-Object { $_.SID.Value -match '-501$' }
if ($guest -and $guest.Enabled) {
    Disable-LocalUser -InputObject $guest
}
Get-LocalUser | Where-Object { $_.SID.Value -match '-501$' } |
    Select-Object Name, Enabled, SID
Do not automatically disable the built-in Administrator as a generic hardening step. Windows may already have it disabled, and some recovery workflows depend on it. First confirm that a separate administrator account works, that its password is known, and that recovery options are available. If you want to stop tools from guessing the default account name, you can rename the built-in account. Renaming does not change its SID, so it is only a small obscurity measure, not a substitute for a strong password, account lockout, or limiting network sign-in.
Choose a unique name that is not already in use. The script checks for a collision and locates the built-in account by its SID, so it works even if the account has already been renamed or Windows is localized:
#Requires -RunAsAdministrator
$newName = 'LocalOps-7F3'
$builtinAdmin = Get-LocalUser | Where-Object { $_.SID.Value -match '-500$' }
if (-not $builtinAdmin) {
    throw 'The built-in Administrator account (SID ending in -500) was not found.'
}
if (Get-LocalUser -Name $newName -ErrorAction SilentlyContinue) {
    throw "A local account named '$newName' already exists. Choose another name."
}

Rename-LocalUser -InputObject $builtinAdmin -NewName $newName
Get-LocalUser -SID $builtinAdmin.SID |
    Select-Object Name, Enabled, SID
Replace LocalOps-7F3 with a unique name that fits your account-management policy. Store the resulting name in your administrator records, then verify that your separate administrator and recovery paths still work. Do not rename a managed account locally if policy or support procedures expect its current name.
For daily use, sign in with a standard account and elevate only when needed. Use unique passwords and consider Windows Hello or other phishing-resistant sign-in methods where supported. Remove stale accounts after confirming their files, scheduled tasks, services, and ownership requirements have been handled.
Set Account Lockout and Sign-in Privacy
Account lockout slows repeated password guessing, but aggressive values can also let someone deliberately lock out a user. New Windows 11 installations may already apply a lockout threshold. Check the effective local policy before changing it:
net accountsFor a standalone PC, an example local policy is ten invalid attempts, a ten-minute lockout, and a ten-minute counter reset window:
#Requires -RunAsAdministrator
net accounts /lockoutthreshold:10 /lockoutduration:10 /lockoutwindow:10
net accounts
These values are not a universal recommendation. Validate organizational policy and test recovery before tightening them. Domain-joined devices should use the organization’s domain or device-management policy instead of competing local settings.
To avoid displaying the last signed-in user name on the interactive sign-in screen, configure the corresponding local policy (or centrally managed policy) rather than confusing it with a session lock:
#Requires -RunAsAdministrator
$policy = 'HKLM:\SOFTWARE\Microsoft\Windows\CurrentVersion\Policies\System'
New-Item -Path $policy -Force | Out-Null
New-ItemProperty -Path $policy -Name DontDisplayLastUserName `
    -PropertyType DWord -Value 1 -Force | Out-Null
For unattended workstations, configure Interactive logon: Machine inactivity limit in Local Security Policy (secpol.msc) or through the appropriate Group Policy. This is the idle-lock control. Interactive logon: Machine account lock threshold is a different, specialized control: on supported Windows 11 24H2 systems it applies only with BitLocker and can lock the whole machine until the BitLocker recovery key is supplied. Do not use it as a substitute for a screen timeout.
Block Incoming ICMP Echo Requests Without Breaking Other Services
Disabling inbound echo-request rules stops ordinary ping replies covered by those rules; it does not turn off the network adapter or inherently block RDP, SMB, web traffic, or outbound connections. Those services still depend on their own firewall rules, listeners, routing, and profile. Conversely, blocking ping can make basic troubleshooting harder, so keep it enabled on trusted networks when diagnostics are useful.
Windows rule display names can be localized. First inspect matching rules on the target system; if your language uses different names, identify the matching ICMP echo request rules in Windows Defender Firewall with Advanced Security (wf.msc).
#Requires -RunAsAdministrator
$names = @(
    'File and Printer Sharing (Echo Request - ICMPv4-In)',
    'File and Printer Sharing (Echo Request - ICMPv6-In)'
)
$rules = Get-NetFirewallRule -DisplayName $names -ErrorAction SilentlyContinue
$rules | Select-Object DisplayName, Enabled, Profile, Direction
$rules | Disable-NetFirewallRule
To restore ping replies, enable the same rules:
$names = @(
    'File and Printer Sharing (Echo Request - ICMPv4-In)',
    'File and Printer Sharing (Echo Request - ICMPv6-In)'
)
Get-NetFirewallRule -DisplayName $names -ErrorAction SilentlyContinue |
    Enable-NetFirewallRule
This modifies the matching rules across their configured profiles. If you only intend to change Public networking, select the appropriate profile-specific rules in the firewall console instead of broadly enabling or disabling every similarly named rule.
Disable Legacy SMBv1, LLMNR, and NetBIOS Name Service
SMBv1 is a legacy file-sharing protocol. Modern Windows and current NAS devices should use SMB 2 or SMB 3. Check the optional feature before removing it; old appliances and software may still depend on SMBv1. The command below avoids an immediate reboot so you can plan one:
#Requires -RunAsAdministrator
Get-WindowsOptionalFeature -Online -FeatureName SMB1Protocol
Disable-WindowsOptionalFeature -Online -FeatureName SMB1Protocol -NoRestart
Restart Windows during a maintenance window, then verify:
Get-WindowsOptionalFeature -Online -FeatureName SMB1Protocol |
    Select-Object FeatureName, State
LLMNR is a local name-resolution fallback that can be abused on networks where clients trust unsolicited responses. Disable it through policy when your network uses working DNS. This registry policy is the setting represented by Turn off multicast name resolution; a managed policy may overwrite it:
#Requires -RunAsAdministrator
$dnsPolicy = 'HKLM:\SOFTWARE\Policies\Microsoft\Windows NT\DNSClient'
New-Item -Path $dnsPolicy -Force | Out-Null
New-ItemProperty -Path $dnsPolicy -Name EnableMulticast `
    -PropertyType DWord -Value 0 -Force | Out-Null
NetBIOS over TCP/IP is separate from LLMNR. Disabling it may break older discovery or name-resolution workflows. If you have tested your network and want to turn it off on enabled adapters, this CIM call sets the NetBIOS option to disabled (2):
#Requires -RunAsAdministrator
Get-CimInstance -ClassName Win32_NetworkAdapterConfiguration `
    -Filter 'IPEnabled = TRUE' |
    Where-Object { $_.TcpipNetbiosOptions -ne 2 } |
    Invoke-CimMethod -MethodName SetTcpipNetbios `
        -Arguments @{ TcpipNetbiosOptions = 2 }
Test file shares, printers, and device discovery after changing legacy protocols. A hardening change that breaks an essential workflow tends to be silently reversed; a tested, documented policy lasts longer.
Enable Remote Desktop Network Level Authentication
If Remote Desktop is enabled, Network Level Authentication (NLA) requires the client to authenticate before Windows creates a full remote session. It improves the pre-authentication boundary, but it does not enable RDP, open the firewall, or make exposing RDP directly to the internet a good idea. Prefer a VPN or a managed remote-access gateway, unique accounts, and narrow firewall scope.
The Settings UI is Settings > System > Remote Desktop; turn on the option requiring Network Level Authentication. For a local PowerShell alternative, set the RDP listener property:
#Requires -RunAsAdministrator
$rdpListener = 'HKLM:\SYSTEM\CurrentControlSet\Control\Terminal Server\WinStations\RDP-Tcp'
Set-ItemProperty -Path $rdpListener -Name UserAuthentication -Type DWord -Value 1
Get-ItemProperty -Path $rdpListener -Name UserAuthentication
Confirm that your RDP client supports NLA before enforcing it on a machine you administer remotely. If you are intentionally not using Remote Desktop, leave it disabled and do not create inbound RDP firewall exceptions.
Turn On Memory Integrity After Checking Compatibility
Memory integrity, also called Hypervisor-protected Code Integrity (HVCI), uses virtualization-based security to protect kernel code integrity. It depends on virtualization and compatible drivers. An incompatible driver can prevent activation or cause device problems, so update firmware and drivers and check Windows Security first.
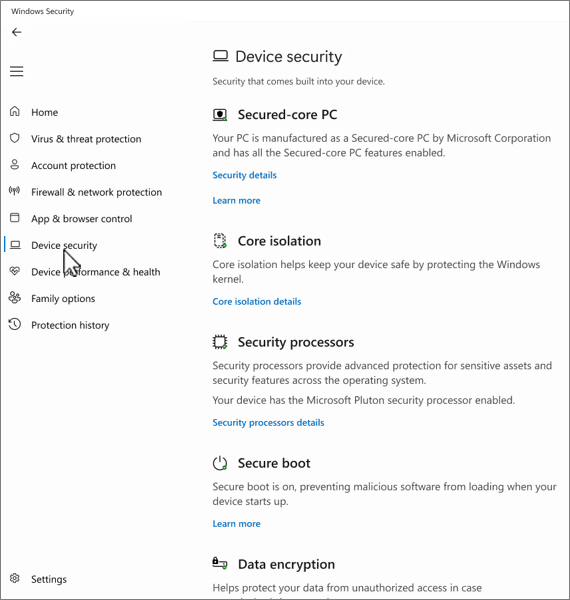
Microsoft Support screenshot: Device security in the Windows Security app.
Open Windows Security > Device security > Core isolation details, then switch Memory integrity on and restart if prompted. If Windows reports an incompatible driver, identify and update or remove the driver rather than forcing a registry toggle. Check the result in Windows Security or System Information (msinfo32). This read-only query also reports Device Guard status on supported systems:
Get-CimInstance -Namespace root\Microsoft\Windows\DeviceGuard `
    -ClassName Win32_DeviceGuard |
    Select-Object VirtualizationBasedSecurityStatus,
        SecurityServicesConfigured, SecurityServicesRunning
Treat hardware-backed protections as a compatibility-tested rollout, especially on older PCs with specialized peripherals or drivers.
Use Defender Attack Surface Reduction Rules in Audit Mode First
Attack Surface Reduction (ASR) rules can block risky behavior such as executable content launched from email and Office applications creating child processes. Their effect depends on the work users do; a rule that blocks a real attack technique can also affect legitimate macros, line-of-business add-ins, or document workflows. Audit first, review Defender events, then enforce selected rules after testing.
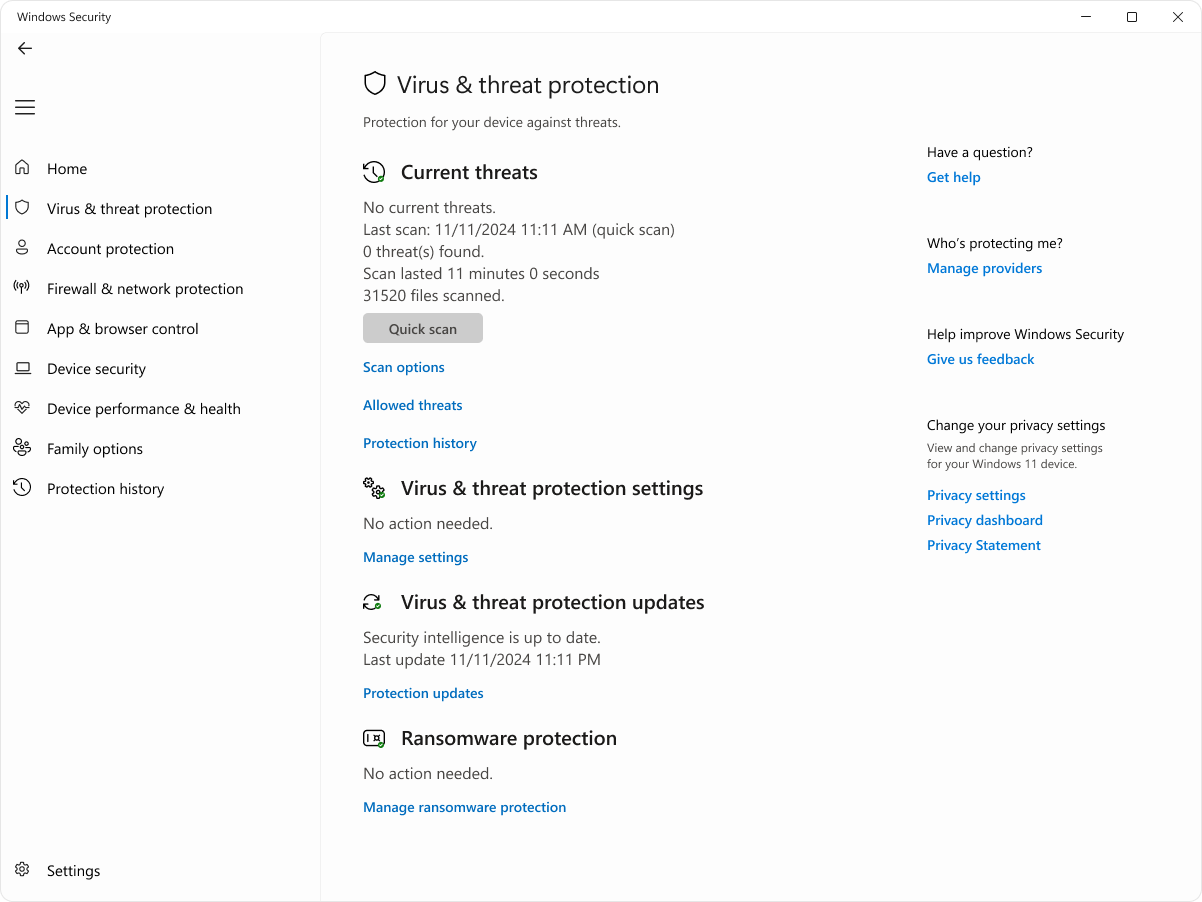
Microsoft Support screenshot: Virus and threat protection in Windows Security.
The sample below adds three commonly considered rules in Audit mode: executable content from email/webmail, Office child processes, and Office executable content. Defender Antivirus must be active, and organization policy may take precedence. Review existing policy and management ownership before changing a managed device.
#Requires -RunAsAdministrator
$ruleIds = @(
    'be9ba2d9-53ea-4cdc-84e5-9b1eeee46550', # Email client executable content
    'd4f940ab-401b-4efc-aadc-ad5f3c50688a', # Office child processes
    '3b576869-a4ec-4529-8536-b80a7769e899'  # Office executable content
)
$audit = @('AuditMode', 'AuditMode', 'AuditMode')
Add-MpPreference -AttackSurfaceReductionRules_Ids $ruleIds `
    -AttackSurfaceReductionRules_Actions $audit
Get-MpPreference | Select-Object -ExpandProperty AttackSurfaceReductionRules_Ids
Observe real usage for a representative period and inspect Event Viewer > Applications and Services Logs > Microsoft > Windows > Windows Defender > Operational. Use the event details and your organization’s Defender management tooling to distinguish expected application activity from blocked behavior. Once owners have tested the impact, set an approved rule to Block using your authoritative management method. Keep a record of rule IDs and a rollback plan; do not replace the entire ASR configuration just to change these three rules.
PowerShell Constrained Language Mode Is Not a Toggle
Constrained Language Mode limits certain PowerShell language features, but assigning $ExecutionContext.SessionState.LanguageMode = 'ConstrainedLanguage' in an ordinary script does not establish a trustworthy security boundary. A user who controls the session can start another session. Microsoft documents that application control policies such as App Control for Business/Windows Defender Application Control and AppLocker can cause PowerShell to enforce constrained language for untrusted scripts.
You can inspect the current session mode with:
$ExecutionContext.SessionState.LanguageModeFor a managed fleet that needs script restrictions, design and test an application-control policy in audit mode, validate business applications and signed administration scripts, then deploy enforcement through supported policy management. Do not distribute a script that claims to secure a PC merely by setting its own language mode.
A Practical Order of Operations
For a personal Windows 11 PC, I would begin by installing updates, checking that Defender and the firewall are on, ensuring daily work uses a standard account, and confirming backup and BitLocker recovery access. Then disable Guest if enabled, remove SMBv1 if no device needs it, and disable LLMNR only after confirming DNS is reliable. Configure an idle lock and appropriate account lockout policy. If RDP is needed, require NLA and restrict network access. Finally, check Memory Integrity compatibility and audit ASR rules before blocking behavior.
After each group of changes, verify the feature you care about: sign in with the recovery administrator, open expected file shares, connect with the intended RDP client, and review Defender events. Keep notes on what was changed and how to reverse it. For managed computers, make the change in the device-management policy rather than layering undocumented local edits underneath it.
Further Reading
- Local accounts in Windows
- Account lockout threshold policy
- Windows Security: Device security
- Enable virtualization-based protection of code integrity
- Attack Surface Reduction rules overview
- Configure Attack Surface Reduction rules
- PowerShell language modes
- How App Control for Business works with PowerShell
💬 Comments