These are Windows troubleshooting notes I keep coming back to: SMB errors that block file shares, WSL refusing to start, Windows 11 complaining about TPM in VMware, and disk space disappearing after background downloads. The common thread is simple: start with the error, isolate the layer that is failing, and fix that layer before changing everything around it.
Quick answer
For Windows troubleshooting, start by proving which layer is broken before changing settings. For SMB share errors, test port 445, credentials, and SMB signing. For WSL crashes, restart WSL, check the distribution state, and confirm virtualization is healthy. For VMware Windows 11 install problems, verify TPM and Secure Boot settings. For disk space issues, find the folder consuming space before deleting files.
Part 1: Troubleshooting Common Network Share Errors (Error 5, 53, and SMB Signing)
Accessing Windows network shares (SMB) is routine until it fails. Messages like “Access is Denied” or “The network path was not found” are vague, but they usually point to a small set of causes.
I usually sort these errors into three buckets: Connectivity, Permissions, or Security Policy. That keeps the troubleshooting process controlled instead of turning it into random registry edits and firewall changes.
The Diagnostic Flow: A Systematic Approach
Instead of guessing, follow this logical flow. Start at the top and move down until your issue is resolved.
-
Test Connectivity (Port 445): Can your client machine reach the server on the correct port?
IfTest-NetConnection -ComputerName "YourServerName" -Port 445TcpTestSucceededisFalse, you have a Connectivity Problem. -
Test Guest/Anonymous Access: If connectivity is confirmed, can you list the shares anonymously?
If you get “System Error 5 has occurred. Access is denied.”, you have a Permissions Problem.net view \\YourServerName -
Test Secure Connection: If the previous steps work but your application still fails, you may have a security policy mismatch. If the error mentions SMB Signing, you have a Security Policy Problem.
Fixing Connectivity - “The network path was not found” (Error 53)
This error means your computer cannot find a route to the server. It’s a fundamental networking issue.
Root Cause: Name Resolution or Firewall
- Name Resolution Failure: Your computer cannot resolve the server’s hostname to an IP address.
- Network Path Blocked: A firewall on the client, server, or network is blocking the SMB port (TCP 445).
The Solution: A Step-by-Step Diagnostic Process
I follow these steps on the client machine to diagnose and fix the problem.
Step 1: Fix Name Resolution
If Test-NetConnection failed, try it again with the server’s IP address.
Test-NetConnection -ComputerName "192.168.1.10" -Port 445hosts file (C:\Windows\System32\drivers\etc\hosts) mapping the IP to the hostname.
192.168.1.10 YourServerNameStep 2: Ensure the SMB Port (445) is Open
If Test-NetConnection fails even with the IP address, a firewall is likely blocking the port.
On the Server: Run these PowerShell commands as an Administrator to ensure the firewall allows SMB traffic.
# Enable the built-in "File and Printer Sharing" firewall group
Enable-NetFirewallRule -DisplayGroup "File and Printer Sharing"
# Ensure the SMB server service is running
Start-Service LanmanServer
Set-Service LanmanServer -StartupType Automatic
By fixing connectivity and name resolution, you eliminate Error 53.
Fixing Permissions - “Access is Denied” (Error 5)
This error means you’ve reached the server, but it has rejected you. When accessing a share that should be “open,” the cause is almost always a server-side policy blocking guest access.
Root Cause: Blocked Guest/Anonymous Access
Modern Windows versions, for security, disable insecure guest logons by default. Even if your share permissions allow “Everyone,” this policy will reject any connection that isn’t explicitly authenticated with a known user account.
The Solution: Enable Insecure Guest Logons on the Server
To resolve this for a trusted internal network, you must change this policy on the server hosting the share.
Run the following in an elevated PowerShell prompt on the server:
# Allow insecure guest logons, required for guest access to SMB shares
Set-ItemProperty -Path "HKLM:\SYSTEM\CurrentControlSet\Services\LanmanWorkstation\Parameters" `
    -Name "AllowInsecureGuestAuth" -Value 1 -Type DWord -Force

# Restart the SMB server service to apply the changes
Restart-Service -Name "LanmanServer" -Force

Write-Host " Guest access enabled. You can now test the connection from a client." -ForegroundColor Green
Security Warning: This setting should only be used in trusted, internal networks. For any sensitive environment, always use shares secured with specific, authenticated user accounts.
Fixing Policy - “SMB Signing Required”
If you can connect but receive an error stating “your computer is configured to require SMB signing,” you have a security policy mismatch.
Root Cause: SMB Signing Mismatch
SMB signing is a feature that verifies the integrity of every packet to prevent man-in-the-middle attacks. The error occurs when your client requires signing, but the server does not. The client, enforcing its stricter policy, refuses to connect.
The Solution: Align SMB Signing Policies
You must make the client and server agree.
Option A: Disable Signing Requirement on the Client (Quick Fix)
This is the fastest solution for trusted networks. Run this in an elevated PowerShell prompt on the client:
# Disable the requirement for SMB signing on the client
Set-ItemProperty -Path "HKLM:\SYSTEM\CurrentControlSet\Services\LanmanWorkstation\Parameters" `
    -Name "RequireSecuritySignature" -Value 0 -Type DWord -Force

Write-Host "SMB signing requirement has been disabled on this client." -ForegroundColor GreenOption B: Enable SMB Signing on the Server (More Secure)
For production environments, the better fix is to enforce signing on the server. Run this in an elevated PowerShell prompt on the server:
# Enable and require SMB signing on the SERVER
Set-SmbServerConfiguration -RequireSecuritySignature $true -Force

Write-Host "SMB signing has been enabled and required on this server." -ForegroundColor Green
Part 2: Fixing the “WSL Crashed” Connection Error
You might encounter this error when trying to open your Linux distribution:
A connection attempt failed because the connected party did not properly respond after a period of time, or established connection failed because connected host has failed to respond.
Error code: Wsl/Service/0x8007274c
What Is This Error in WSL?
The error message “Error code: Wsl/Service/0x8007274c” is a Windows networking timeout (SocketException 10060 / HRESULT 0x8007274c). In the context of Windows Subsystem for Linux (WSL), it means that wsl.exe cannot connect to the WSL service or the Linux VM backend (WSL 2).
This typically happens when:
- The WSL VM is unresponsive, frozen, or crashed.
- The WSL service (LxssManager) is hung.
- Memory or resource exhaustion prevents the Linux kernel from responding.
- Conflicts occur with Docker Desktop, VS Code Remote-WSL, or antivirus software.
- The Linux distro becomes corrupted after a failed shutdown or update.
How to Fix It
I follow each step in order. I run commands in PowerShell or Command Prompt as Administrator.
1. Force shutdown WSL
Shut down all WSL instances and the VM.
wsl --shutdown2. Restart the WSL service
net stop LxssManager
net start LxssManager
Or via Services.msc -> LxssManager -> Restart.
3. Restart Hyper-V components (WSL 2 only)
Restart-Service vmcompute
4. Unregister and reinstall the distro
If a specific distro is corrupted:
wsl --unregister Ubuntuwsl --install -d Ubuntu5. Full WSL reset (last resort)
wsl --uninstall
Reboot, then reinstall:
wsl --installPart 3: Resolving Windows 11 TPM Errors on VMware
When installing Windows 11 on a VMware virtual machine (Workstation, Player, or ESXi), it’s common to run into a frustrating roadblock:
“This PC can’t run Windows 11” or “TPM 2.0 requirement not met.”
This error occurs because Windows 11 has stricter security requirements, mandating features that are not enabled by default on most virtual machines.
Method 1: The Official VMware Way (Adding a Virtual TPM)
The best and most compliant method is to add a virtual Trusted Platform Module (vTPM) to my VM.
Step 1: Encrypt the Virtual Machine
VMware requires that a VM be encrypted before adding a vTPM.
- Shut down my virtual machine completely.
- Go to VM Settings -> Options -> Access Control.
- Click the Encrypt button and set an encryption password.
Step 2: Add the Virtual TPM Device
- With the VM still powered off, go to VM Settings -> Hardware.
- Click Add -> Trusted Platform Module.
- Click Finish and then OK.
My VM now has a vTPM 2.0 device and will pass the Windows 11 check.
Method 2: Bypassing the TPM Check During Windows Setup
For a quick workaround, you can instruct the Windows 11 installer to bypass the check.
Step 1: Open the Registry Editor During Setup
When you see the “This PC can’t run Windows 11” error screen:
- Press Shift + F10 to open a Command Prompt.
- Type
regeditand press Enter.
Step 2: Create the LabConfig Registry Key
- In the Registry Editor, navigate to:
HKEY_LOCAL_MACHINE\SYSTEM\Setup - Right-click on
Setup, select New -> Key, and name itLabConfig.
Step 3: Create the Bypass Values
- Select the
LabConfigkey. - Create three new DWORD (32-bit) Values, setting the data for each to
1:BypassTPMCheckBypassSecureBootCheckBypassRAMCheck
Close the editors, click the back arrow in Windows Setup, and proceed. The installer will now skip the checks.
Part 4: Solving the BackgroundDownload.exe C: Drive Full Issue
I logged into Windows and saw a system popup:
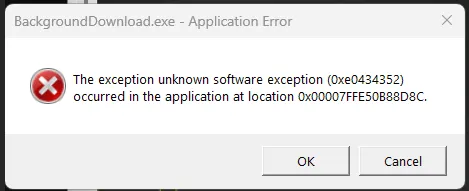
Unknown software exception (0xe0434352)What Is BackgroundDownload.exe?
BackgroundDownload.exe is a legitimate Windows 11 system component in C:\Windows\System32\ used for downloading Windows Updates and Microsoft Store apps. The error code 0xe0434352 is a generic .NET runtime crash.
Why My C: Drive Became Full
When BackgroundDownload.exe crashes during a large update:
- Huge temporary files accumulate in
C:\Windows\SoftwareDistribution\Downloadand%TEMP%. - The crash prevents the cleanup of these files, causing the disk to fill up.
After a reboot, Windows cleanup routines typically remove the orphaned files, restoring the disk space.
How to Fix the Error and Prevent Recurrence
Follow these steps as an administrator.
1. Repair Windows System Files
Run DISM and SFC to fix underlying corruption.
DISM /Online /Cleanup-Image /RestoreHealth
sfc /scannow
Reboot when finished.
2. Repair .NET Framework and Runtime
The .NET crash is often the root cause.
- Install and run the Microsoft .NET Framework Repair Tool.
- Ensure necessary .NET runtimes are installed via Settings -> Apps -> Optional features.
3. Clear Windows Update Cache
- Run Disk Cleanup as Administrator.
- Check Windows Update Cleanup and Temporary Files.
- Manually delete the contents of
C:\Windows\SoftwareDistribution\Download.
Reboot after clearing the cache.
Conclusion
Troubleshooting Windows is a logical process. By understanding the root cause-be it a networking block, a permissions issue, a virtualization setting, or a crashed service-you can apply a targeted fix instead of relying on guesswork. Keeping this framework in mind will turn a frustrating dead-end into a solvable, step-by-step puzzle.
💬 Comments